Do you hear real-time microphone playback of your vocals every time you hit record in Fl Studio?
If that's so, don't worry because, in this article, we'll give you the ultimate solution to your problem.
But before we dive in, we must discuss and learn more about our problem.
I have been a victim.
This happened to me a couple of years ago. I was a beginner in music and production and a total rookie to Fl Studio.
After I finished my first beat, I wrote rhymes, and I was ready to record.
I wore my headphones. But, once I hit the record button, guess what happened.
I started hearing my raspy voice.
This experience was intimidating.
I was freaking out because I couldn't record without hearing myself. The playback and the audio delay made it impossible for me to record.
But I later learned from a friend that audio recording experts refer to what happened to me, which you're also struggling with, as mic monitoring.
Mic Monitoring: What is it?
Mic monitoring is an FL Studio feature that allows you to hear your voice when you record. It feeds your input to your master track and then your headphones when you record your voice.
Read Also: What is Microphone Feedback and How To Eliminate For Good
How to disable mic monitoring in Fl Studio and not hear yourself
Hearing yourself singing is intimidating and confusing.
For this reason, you must set up your recording so that you don't hear your vocals in the master channel.
Turning off your mic monitoring will also help you focus on the beat or track by disabling audio playback and delays.
During recording, your microphone captures frequencies in an analog format. Your computer then reads and translates the frequencies into digital format (The sound you hear). Because of this process, you experience latency and delay on your headphones.
Most people think by reducing their buffer length size, the problem will magically disappear. But it doesn't work that way.
Not to worry.
Here is a step-by-step guide on how to not hear yourself while recording in FL studio.
Option 1
- Open Fl studio, DAW.
- Open the mixer window.
- Find the mixer channel you've selected for recording. Tip: Your recording channel is the one with a red circle at the bottom of the mixer.
- Click on your recording channel. You'll see a green code running from the recording channel to your master track. In Fl studio, when you create an input channel, it connects with your master channel by default.
- Follow this green code to your master channel.
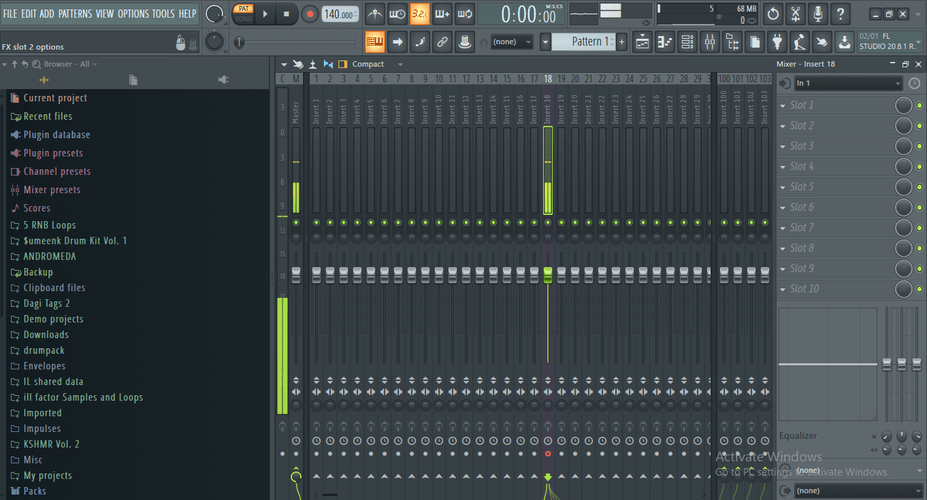
Left-click on the arrow that connects your master channel and recording track. You'll notice that the code disappears, and your recording channel no longer routes to your master channel.
And Voila!
There you have it.
You've turned off your mic monitoring, and now you can record without hearing yourself.
Now when you sing, you or your vocalist will only hear the beat or track.
It's simple as this, as long as your recording channel is not connected to your master channel, you will not hear yourself while recording.
Option 2
The second way to avoid hearing yourself while recording your vocals in FL studio is by controlling the real-time playback volume.
Here, you turn down the volume of what you hear on your headphones while you sing.
To hear yourself in lower volume, follow this simple step-by-step guide.
- Open Fl studio.
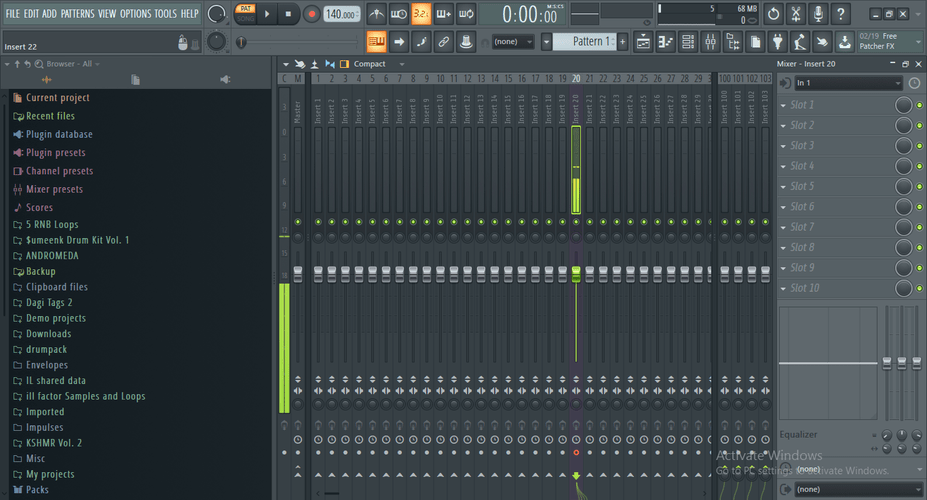
- Open the mixer window.
- Click on your recording channel; Where your microphone input is plugged in. Your recording channel is connected to the master with a green code.
- Follow the green line and turn down the 'to master' volume fader. The volume knob is the green circle under your master channel.

Read also: What is Gain on a Microphone: 3 Different Kinds Explained
Here's a catch.
Hearing yourself while recording isn't necessarily a bad thing. It has its advantages.
If you're a recording engineer, you probably work with many artists.
Sometimes you might work with an artist who wants to hear themselves as they record. This trick is common amongst many professional singers like Beyonce. It's also common among DJs.
Some artists also prefer to record with special effects like autotune, delay, and reverb.
If you ever host such a client or want to try it yourself, learn how to record the best way with mic monitoring and effects.
How to record and hear yourself with mic monitoring and special effects in FL studio?
Hearing yourself while recording is important. It helps you achieve 5 things:
- Track your progress
- Hear your tonality
- Hear your pronunciation and articulation
- Get your timing right
- Improve on your areas of weakness
So let's say you or your vocalists want to hear themselves with special effects like reverb delay or flanger while recording.
In this case, you must record with mic monitoring on. This can be quite challenging if you're a total novice to Fl studio.
We've put together this simple guide to help your record with your favorite special effects.
Recording with effects like reverb and delay helps you and your vocalists feel immersed in the song and make your recording session feel alive.
It makes you feel confident whether you're performing live on a stage or recording vocals. Here's a step-by-step guide on how to hear yourself in FL studio with effects.
- Open FL studio
- Set your buffer length size to either 512, 256, or 128 samples. Do not go beyond 512 samples. Otherwise, you'll experience delays because of latency.
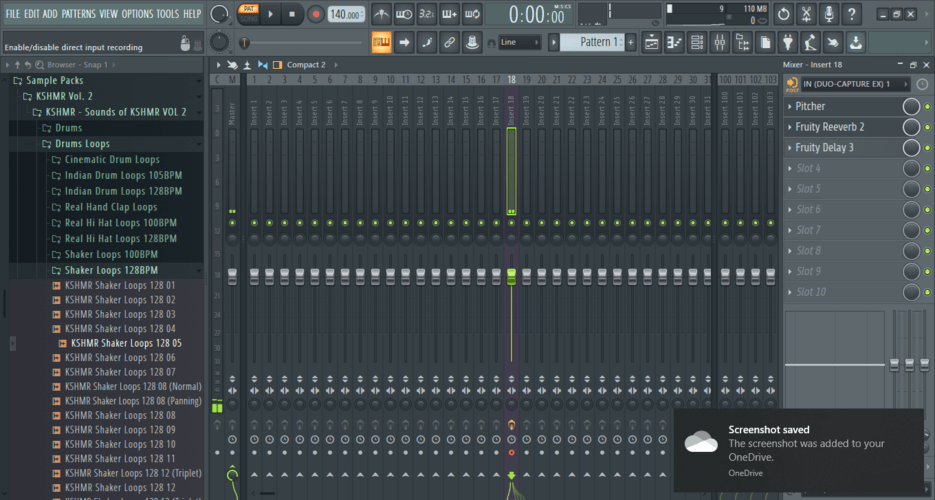
- Select your recording channel and ensure it's linked to the master channel by a green code.
- If it's not connected to the master. Click your recording track and then locate your master channel and click the arrow below it.
- Now add your favorite auto-tune, reverb, or delay to your recording mixer track.
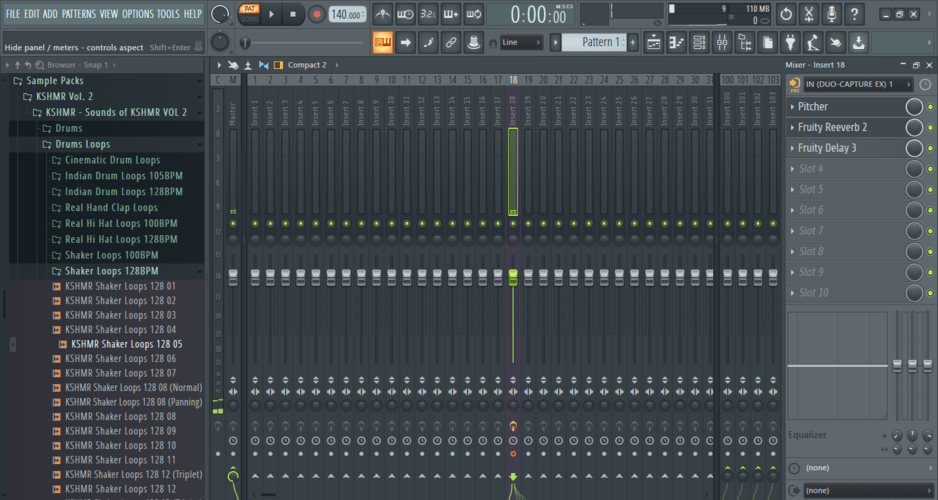
- Now there's an arrow with a box to the left of your recording mixer channel. It shows the word 'POST' but when you click on it turns to 'PRE'.
Read Also: How to Earrape Mic? (Discord, Zoom) – Don't Miss this Guide
When it's 'POST' mode, it means you'll record after the effects. The result of this is a wet vocal with effects.
A wet vocal is tuned, has reverb and delay. But this limits you from adding more effects when you're mixing the vocal.
On the other hand, when it shows the word 'PRE', your recording doesn't go through your effects rack. And even though you can hear the effects while you record, your vocal recording comes out dry. And you can later add different effects on the mixing stage.
Remember option 2 from the previous section. Apply it to adjust the volume of playback on your headphones to your taste. Or to your vocalist's liking.
Here's a tip: keep your playback volume low so that you can sing better. And not shout.
See our other popular posts
- The 5 Best Audio Technica Mics on a Budget 2026 [Edition]
- 4 Best Mics for Blumlein Stereo Recording in 2026 [Tested]
Conclusion
Now you should not struggle with recording in FL studio anymore.
Apply the gems you've learned in this blog to not hear yourself at all while recording in Fl studio.
Also, use them if you want to hear real-time playback of yourself in low volume.
And apply them again to hear yourself taste with special effects like auto-tune, reverb, and delay.