Nobody likes to compromise the speaker positions just because the wire fell short. Not only does it ruin your desired speaker layout, but the sound also gets affected too.
Want to get rid of short speaker wire issues? Lucky for you, we have the solution.
Know all you have to about how to extend speaker wires here. These tricks will come real handy whenever you want to place your speakers anywhere in the room.
Various options on extending the speaker wire
Solder and extend the wire
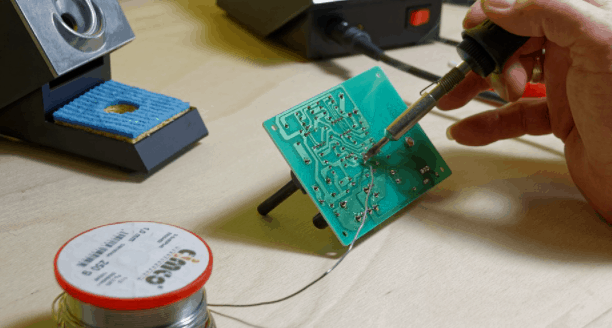
Soldering is undoubtedly one of the most reliable ways of creating wired connections. But it's not that simple as it seems.
For starters, you will need all the right soldering tools. Next comes expertise with the equipment and maintaining safety.
Once you've covered these pointers, you can follow these steps to extend speaker wires by soldering:
- Begin by disconnecting the speaker wires from the system. Also, keep the new gauge wire nearby. The aim is to melt both these wires together. And for that, you have to expose a minimum of 1-inch of metal from both the wires. Once you do that, twist the metallic ends of both wires together.
- Now it is time for the soldering. It is a slow process so you have to be patient. Don't rush into it. Be very alert while pressing the soldering gun trigger.
- If you press it too much, the wires will burn and the connection will be ruined. Pressing the trigger for half a second at one time is ideal. After that, change the angle and keep repeating the process.
- After soldering both the wires together, you have to attach the new long wire to the node of the speaker. You'll have to use the soldering gun for that too.
- Gently press it against the node and solder it. Once again, it should be done very slowly and carefully to prevent any faulty connections. Make sure you label the wire and check if they are connected to the right nodes
- Repeat the same process for all the wires and speakers. You can't help it but yes, it is a time-consuming process. Nonetheless, this is the toughest connection you can get and it's absolutely worth the time invested.
Using crimp connectors (heat shrink style)
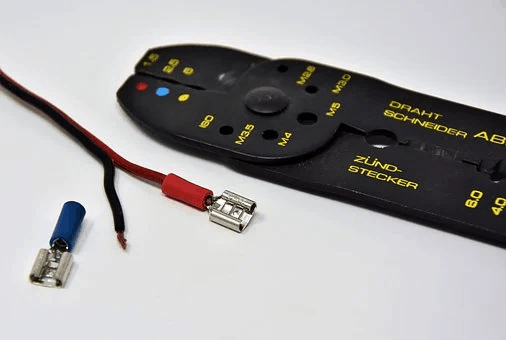
Extending speaker wires using crimp connectors is a surefire thing. Especially when you employ the heat-shrink technique, it's guaranteed you'll get a secure connection.
Unlike soldering, you'll need a heat gun for carrying out this process. Shrink tubes (crimp connectors) can be bought for any hardware store or online. Just make sure the wires fit into the tubes.
Also, you will need wire cutters to remove the rubber coating from the wires.
After getting all the needables, you can simply follow these steps:
- To start with, remove the rubber coating of all the wires up to 1-inch using wire cutters. Slide the metal portion of the wires into both the ends of the shrink tube.
- Be advised that the wires should touch and overlap each other inside the tube. You can also choose to twist the wires together inside the tube.
- Before connecting the tires, you have to check the positive and negative sides of the wire. It can be identified through several ways – a wire with colored insulation is a positive wire while the black one is a negative wire; a wire with golden metal inside it is positive and one with silver metal is negative. On the other hand, wires with printed labels or stamps are positive.
- As soon as you verify the wire connection, power up the heat gun. Just like soldering, you have to be gentle and alert. Don't bring the gun too close to the tube or don't hold the gun at one point for too long.
- If you do so, the tube will melt or burn and ruin your connection. It is recommended to keep the heat gun at a distance and should be moved closer very slowly to the point when it just begins to melt.
- Let the wire rest and cool down for a moment. After that, gently tug the wires from both ends to see if the wires are securely connected.
- If there is no irregular movement, you have created a successful connection. If not, you have to repeat the procedure from the very beginning.
Using twist connectors (wire nuts)
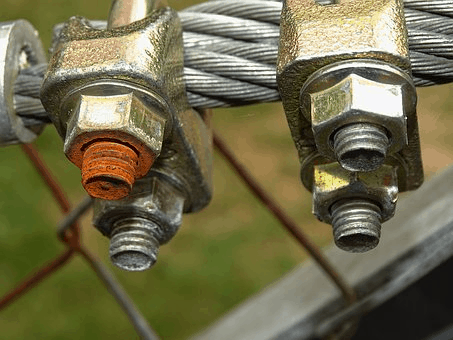
The most affordable way to extend speaker wires is by using twist connectors or wire nuts. It's a fairly straightforward procedure.
Other than wire nuts, you also have to use wire cutters in the process. Here is how it's done:
- Trim the wires to remove the rubber coating and expose 1-inch of metal on both the speaker wire and new gauge wire.
- Up next, twist the metal ends of wires together. It should be a decent attachment. Give it a light wiggle to see if they come apart.
- After checking that, slide a wire nut over them just like a cap. Make sure the wires completely take up the space inside the nut. Then twist the nut to a point when it does not turn anymore. The best way to know when to stop turning is when the wires start turning but the nut doesn't.
- Pull it gently one more time to make sure they are comfortably connected. Don't pull too hard on it as it may come out and damage the connection.
The adapter solution: lengthening connecting cable
Speakers wire RCA cable connections have become popular recently. And whenever RCA cables fall short, it can be a frustrating feeling. Extending such wires can seem like a mammoth task. But it's not quite the case.
Rather than buying a new longer cable, you can get creative with old and short RCA cables. But how do you link them together? With a coupling!
A coupling is one of the most effective ways of connecting and extending RCA cables. It's a small unit with two open ends. All you need to do is insert the similar cables into them and create a longer cable out of two short cables.
With that being said, couplings can be hard to find in hardware stores. The ideal way to get them is ordering them online. You can select from a range of couplings according to your requirements.
Extending speaker wire that has an RCA connector
Many speakers come with a wire that has an RCA connector, mostly in case of subwoofer systems and desktop speakers. Generally, the length of those wires is not long enough. So it becomes difficult to experiment with the position of such speakers.
But don't worry, we have a solution for that.
Now you can even extend a speaker wire with an RCA connector as well!
Here's how:
- First, cut the original speaker wire just outside the spot from where it originates from the speaker. It is usually through a tiny hole on the back of the speaker.
- Then unscrew the bolts and open up the back panel of the speaker. You will find the various components inside – the main speaker, the tweeter, and the wired connections.
- Before disconnecting any wired connection, remember the layout in which they link all the components.
- Generally, the tweeter is connected to the main speaker and the wire that comes out of the body is connected to the main speaker – that acts as the power source. You need to get rid of that power source.
- Carefully disconnect the main wire from the tweeter wire. After that, you can unscrew the main speaker from its position and check for the connection tab.
- Now get the new wire and solder it on the main speaker along with the tweeter wire. Follow the exact layout that you noticed while opening the speaker. Otherwise, it may lead to short circuit or faulty connections.
- Once all the wires are soldered on the circuit, pass the new wire through the tiny hole on the back of the speaker and screw the panel back on the speaker.
- Now all you need to do is connect the new wire with the one that had the RCA connector – the one you cut off. They can be soldered together to create a firm connection.
FAQs on extending the speaker wires
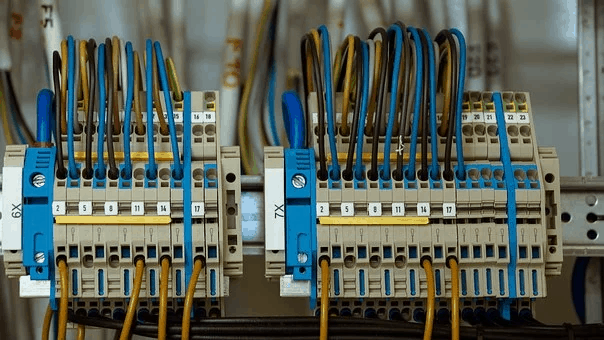
The best way to connect multiple wires together is by using multiple wire connectors. They come in two types – in-line connectors and close-end connectors. The wires can also be soldered and then reinforced with shrink tubes.
The best way to connect multiple wires together is by using multiple wire connectors. They come in two types – in-line connectors and close-end connectors. The wires can also be soldered and then reinforced with shrink tubes.
Speaker wires can be stripped by using a wire stripper. The wire should be inserted into the required wire gauge hole. Then the stripper should be squeezed tightly enough by the insulation and the wire should be pulled out.
The best way to connect multiple wires together is by using multiple wire connectors. They come in two types – in-line connectors and close-end connectors. The wires can also be soldered and then reinforced with shrink tubes.
Conclusion
Why buy new wires when you extend them by a simple method?
With the aforementioned techniques of extending the speaker wire, you can place your speaker anywhere you want.
Brush up on your soldering skills, know all you can about wire nuts and shrink tubes and experience the endless possibilities in wire extensions.
Don't be the slave to limited wire sizes. With these tricks to extend speaker wire, you can be the architect of your sound imagery!