If you're not sure where is the microphone on the MacBook Air, then, fret not! You are at the right place. Let's dive together into my complete guide and know its placement on different models by year!
Quick Answer
Every MacBook Air or Macbook Pro has a microphone, but its sleek design makes it challenging to locate. Therefore, you need to know where to look for it. Generally, there are two potential places where you would find the MacBook microphone. They are:
- On the left side of the keyboard;
- Closer to the speaker's grills.
These two locations are based on which model you own. Continue reading to learn about mic location on different MacBook models. Also, get insights into the testing procedure and control access of the mic. Let's explore this detailed informative guide!
Read also: Where is the Microphone On the MacBook Pro
Locating the Microphone on the MacBook Air (2018 & Silicon Models)
MacBook Air 2018 comes with a built-in microphone located on the left side. They are in the speaker grids; you will most likely find them next to the 3.5 mm headphone jack.
This placement effectively captures audio input during video calls, recordings, or other applications.
How Can I Locate the Microphone on my Older MacBook Air Models (2017 and Earlier)
The design of the first Air, which Steve Jobs introduced in 2009, has not changed much in the models released until 2017. But the good news is, despite being old, the location of a microphone is not challenging to locate.
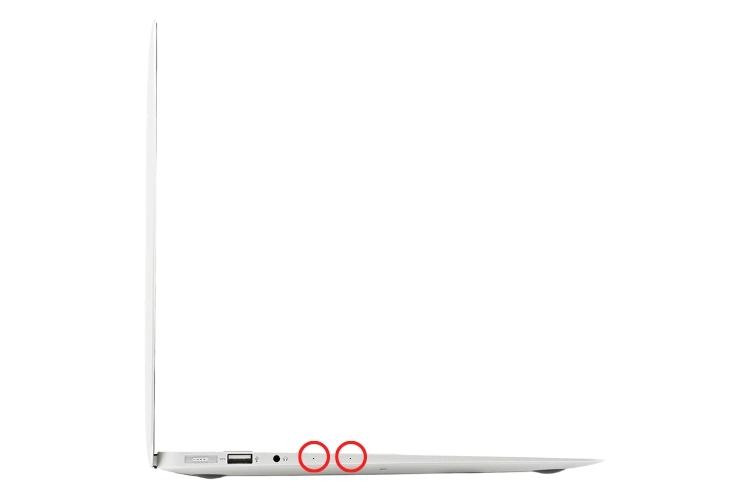
Similar to current generations, especially the one released after the year 2017 have their mics towards the left side of the laptop. If you notice it a bit, you can find it just below the headphone jack port.
Read also: 5 Best Free MIDI Controller Software for Mac in 2025
How Can I Locate the Microphone on my M1 MacBook Air?
The M1 MacBook Air is one of the latest Apple MacBook models, where you can locate microphones on either side of the speaker grills. The proximity of the microphone to the speakers allows for noise cancellation.

The software can better distinguish between your voice and background noise by capturing sound from a similar direction as the speakers. This results in improved audio quality by reducing unwanted sounds.
How Can I Locate the Microphone on my M2 MacBook Air?
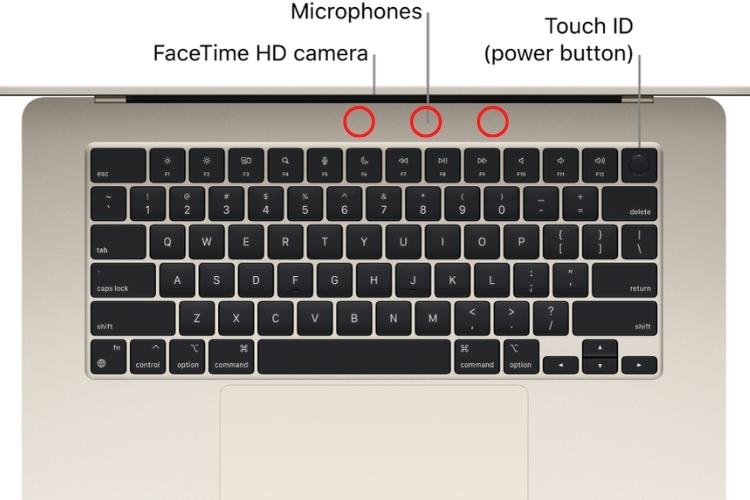
The new M2 MacBook Air comes with changed microphone position. They are now located directly below the screen and above the keyboard.
With this better placement, you can now chat with pals or make voice recordings using the three built-in microphones.
A Step-by-Step Guide on How to Check the Microphone on the MacBook
Here are the instructions for testing the MacBook Air mic. Let's dive in :
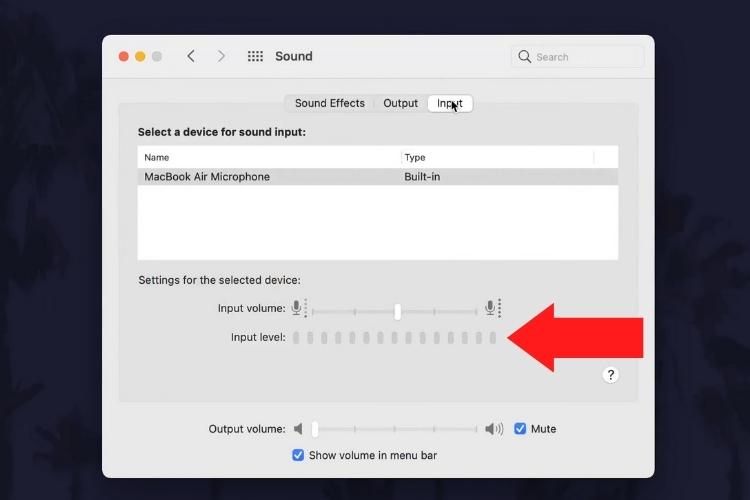
1. Testing the Mic In the System Preferences
The first thing you need to do is to select the Apple menu icon. You can find it on the right side in the input tab. Then do the following:
- Go to system preferences;
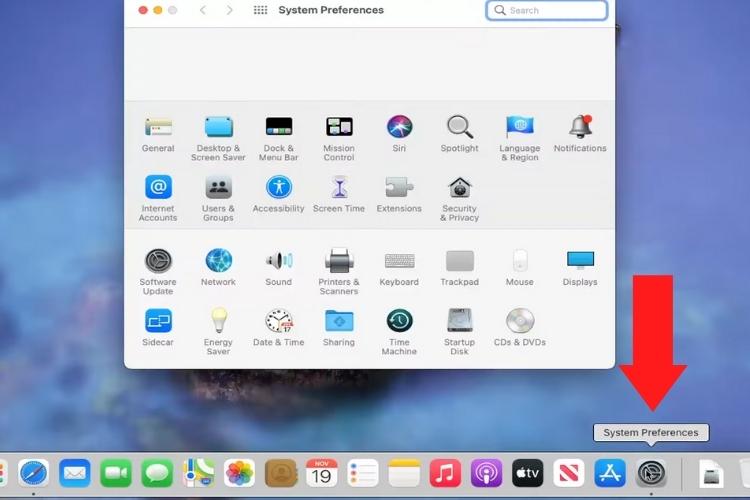
- Click sound;
- Select the input present at the top right;

- Choose microphone;
- Set the required volume and then speak into it to check the quality;
- The volume bars will light up, showing your information is being picked up. If they don't light up or move, your microphone is not working.
2. Testing the Microphone On the Web
There are instances when the Apple menu picks up your microphone, but the app can't; this means you need to grant access to your microphone to that application.
If you're also facing this issue, do the following:
- Open your computer browser and go to the application you want to do the mic test on;
- Click the box that says "Play";
- Your computer will ask if it can use the microphone;
- Then, grant the permission to use the microphone;
- Talk into the mic once the browser has access to it;
- The sound will be shown in the small window under the test area, and the line will change to show how loud the sound is.
Managing Microphone Access on the MacBook
Whether you want to allow access to the microphone or deny it, here's how you can do it:
1. Allowing the Microphone Access
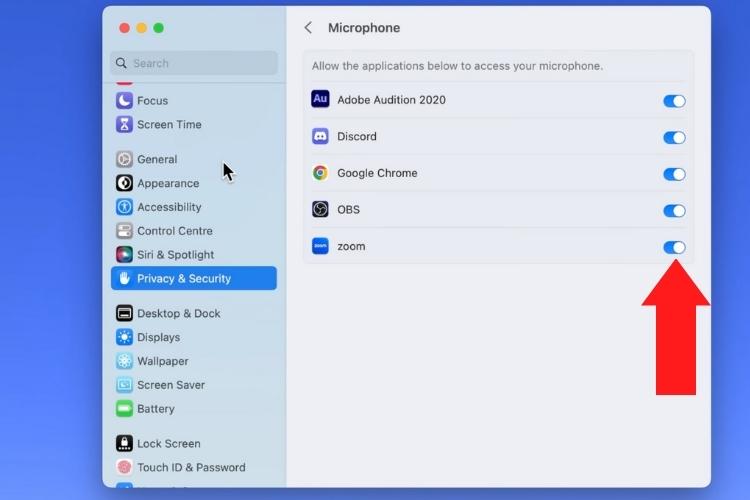
Follow these steps to allow access to the microphone:
- Open your MacBook Air;
- Go to settings from the menu bar;
- Select security and privacy;
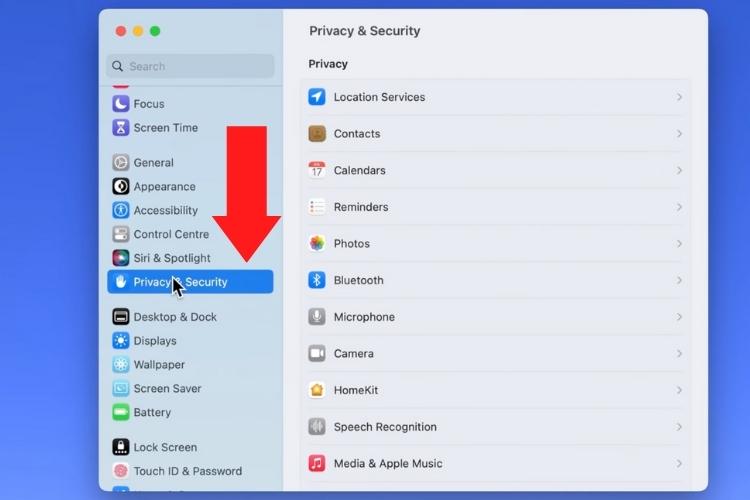
- Opt for the microphone;
- Choose the checkbox next to your microphone to provide the app access.
2. Denying the Microphone Access
To deny the access, you can do the following:
- Open your MacBook Air;
- Select settings from the menu;
- Select Security and Privacy;
- Select Microphone;
- De-select the checkbox to deny access.
Evaluating the Microphone Quality of MacBook
There are 4 important factors that play their part in the Microphone's
- Intended Use: The MacBook's microphone is used for video conferencing, voice memos, and voice commands. They provide quality vocals ideal for communication.
- Voice Recording: For casual recording sessions, the microphone is acceptable. But if you are a professional looking to record podcasts, songs, or high-quality voiceovers you might want to look for an external microphone.

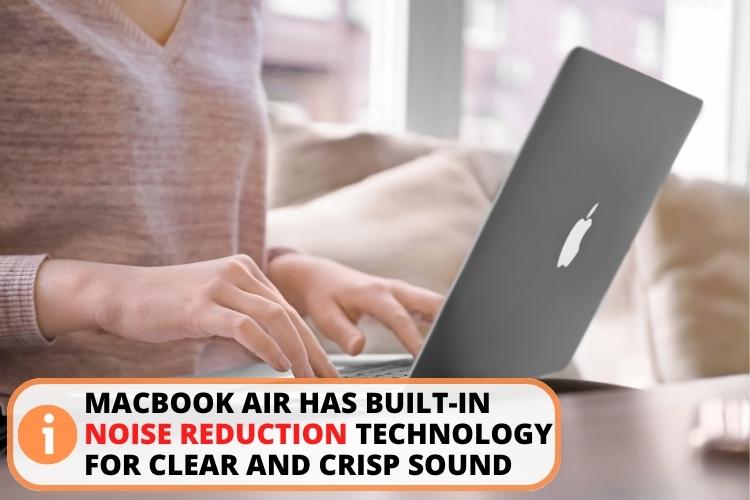
- Noise Reduction: These units come with built-in noise reduction technology to provide you with the crisp and clear sound everyone deserves.
- Software Enhancements: Using audio editing software can also help enhance the quality of recordings made with the MacBook's built-in microphones. You can apply noise reduction, equalization, and other audio processing techniques to improve the overall sound. These mics also come with noise enhancements post-processes such as equalization, compression, and reverb.
Can I Make Quality Calls on This Microphone?
The MacBook Air's microphone delivers excellent performance for both audio and video calls. It consists of an M-series chip in the 2020 MacBook Air that offers software improvements that allow for greater audio collection from the microphone.
However, with newer launches, Apple updated the 2022 MacBook Air with an M2 chip, replacing the M1 chip in the 2020 model.
Maximizing the Performance of MacBook Air's Microphone
There's no doubt that the microphone MacBook features a good mic, but there can be times when you may need to make a few alterations to optimize its performance. Here's how you do it:
1. Change the Volume Settings
For this, you need to do the following:
- Go to System Preferences, then click on Sound and tap on Input;
- Move the slider in both directions to adjust the loudness level of the noise and modify it according to your needs;
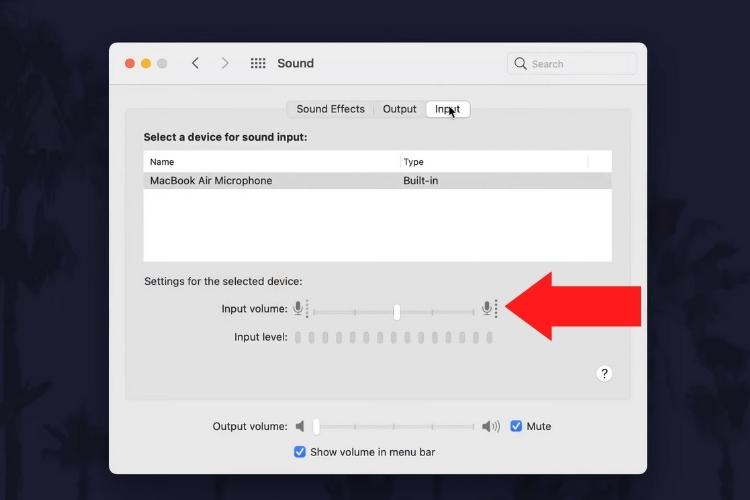
- If you want to remove the background noise, then go to the noise-ambient reduction setting and click on it.
2. Remove Obstructions
When it comes to models earlier than 2020, any loud noise closer to the system will cause obstruction and interference. So, to modify this, you must take the casing off to enhance the sound recording
3. Do the Internal Microphone Mic Test
Try the mic test by saying or singing something in QuickTime Play's new audio recording. Doing so will help you to listen to the audio to check how everything sounds and make necessary adjustments afterward.
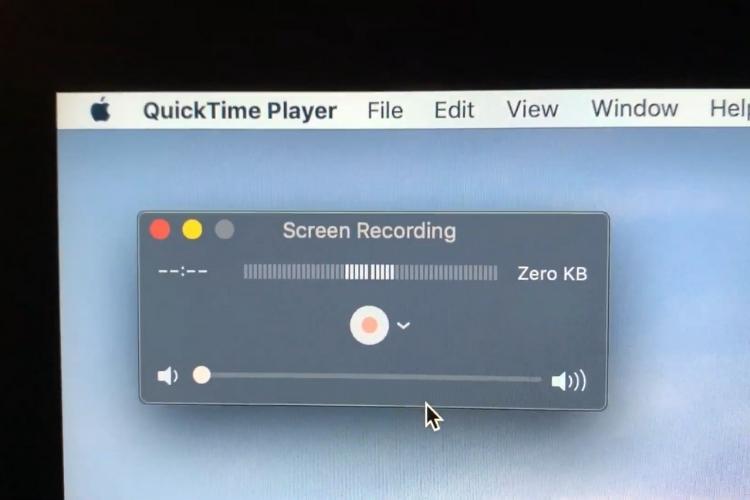
For instance, if you want your voice to be louder, then bring the unit closer to you. But be mindful of the fact that if you place it extremely close to your mouth, then the voice might get distorted. So you need to adjust the distance so that the voice is audible but not too close to make the system overhaul.
4. Use a USB microphone
For the usual day-to-day tasks, the built-in microphone is ideal for most people when it comes to video conferencing or audio calls. But if you require a professional touch, then I recommend going for an external USB microphone.
Similar to integrated microphones, a USB microphone has settings like sensitivity and echo reduction you can change when you need to.
5. In-App Settings
There are some apps that have sound restrictions and can only be changed while they are running. For example, iTunes is one of those examples that lets you make changes within the interface. So, whichever app you're using, ensure you're cross-checking to get the most out of it.
Troubleshooting the Mic Issues
Here is a quick guide on how to resolve the majority of mic issues you may face:
- Rebooting: Reset the Core Audio and restart the notebook completely. This will fix any glitches that you are facing.
- Updating Firmware: Update your operating system to deal with any compatibility issues.
- Resetting NVRAM: If there's any issue with hardware then try resetting the non-volatile RAM (NVRAM) or parameter RAM (PRAM).
FAQs
Yes, there is a microphone on a Mac. You can turn it on or off from the settings menu. Additionally, you click on the ambient noise reduction checkbox to reduce unwanted noises.
The microphone is located in the MacBook Air 2017 and earlier models on the left side beneath the headphone port. Whereas newer models have it in the speaker grills, below the screen, and above the keyboard.
You can test your microphone on a MacBook Air by going to the Apple menu > click sound option > click input > and then speak to check the input bars are moving.
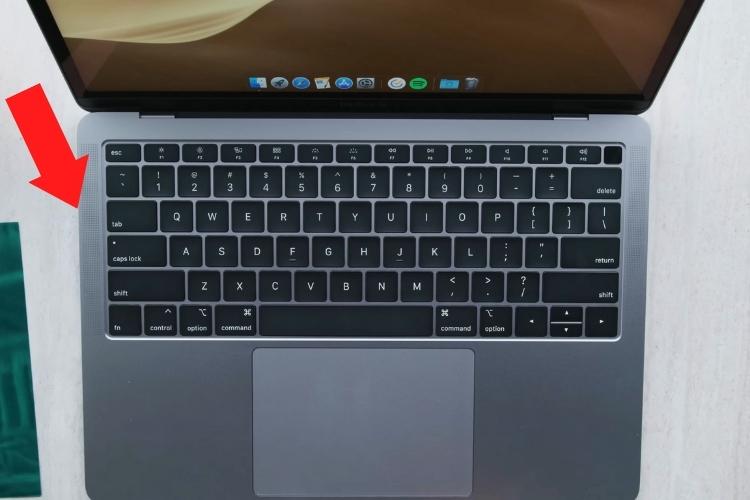
The microphone key on a MacBook is present on the left side of the device above the Esc button.
Conclusion
The final say is knowing where the microphone is located in the MacBook is crucial for clear audio. It's on the left side near the headphone jack for older models. Newer models, like the M1 and M2, have it on beneath the speaker grills, above the keyboard, and below the screen, respectively.
The built-in microphone in the MacBook is of decent quality. However, you might need to use an external microphone if you want to do professional recording. But, if you want to stick to the built-in one, you can optimize its performance, remove obstructions, or use USB mics.
Whatever your need is, ensure you're constantly testing it before the meeting by going to the system settings. This way, you would know how you sound without getting into trouble.